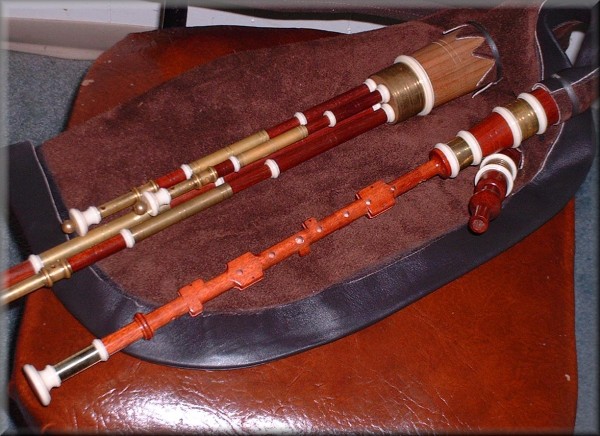
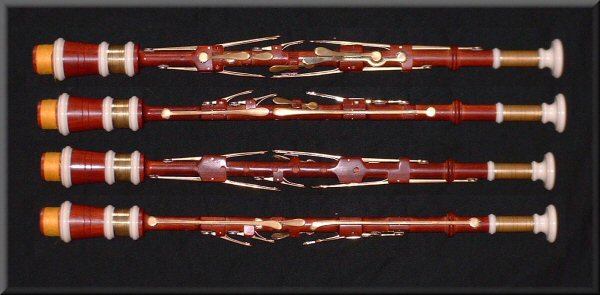
A set of Northumbrian small pipes in concert D. Satine bloodwood, brass, and
imitation ivory. This set has a 10-key chanter, with the keys added in a
little different order than would be found on a "standard" 9 or 11
key chanter, but instead chosen to suit my own eclectic musical needs. With
4 drones, each with a tuning bead, this set will be entirely suitable for use
with Scottish small pipe chanters in A & D as well.
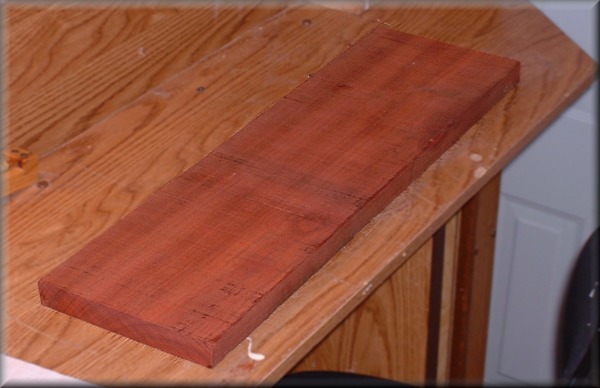 |
(3 Mar 2004) Here is the "before" picture. This is a bloodwood
board, 7" x 24" x 1" thick, which will be more than plenty
for the drones. I've got some 1.5" squares on the way for the chanter
and stocks.
|
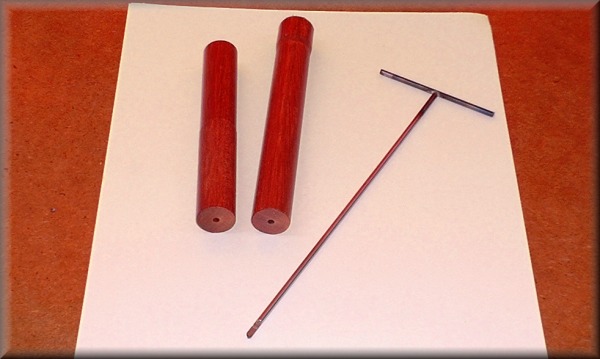 |
(13 Mar) I've started drilling out the drone sections. The drill is a
homemade "D" bit, which (for me, at least) gives a better bore
than twist drills. The downside is that it's very slow going - at 1/8"
diameter, the drill can only be advanced about 1mm at a time, then it
has to be withdrawn to clear the chips.
|
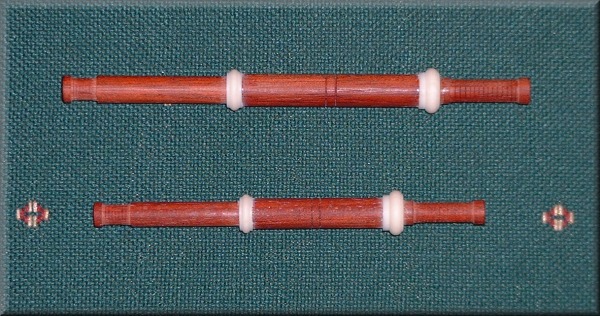 |
(22 Mar) Here are those same two pieces again,
after having been turned into drone sections. They'll look much nicer once
they've been buffed & polished, of course. |
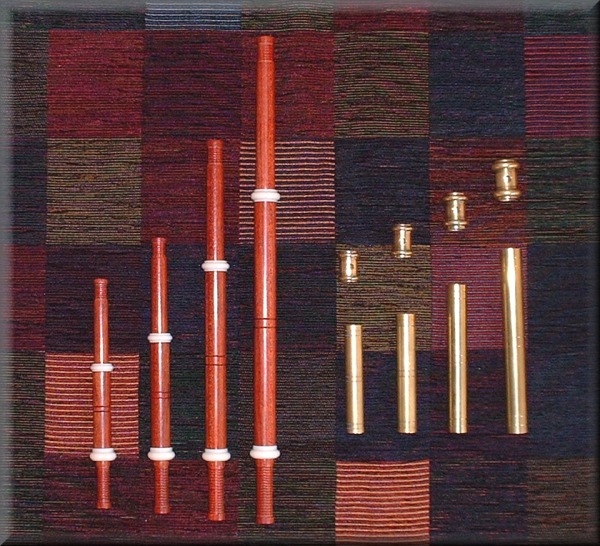 |
(11 Apr) I've been tied up with other things recently, so i haven't been
able to work on these pipes as much as i'd have liked. But i'm back to
work now. :-)
Here are all the drones' standing parts, buffed and polished. To the
right are the tuning slide tubes and the tuning beads.
|
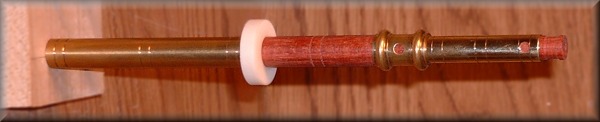 |
(13 Apr) Here is a sliding part in the early
stages. It illustrates how the parts fit together, though. You can see where
there will be two holes drilled down to the bore. The tuning bead will ride
on a thin cork pad. I also have yet to make the end mount and the plunger
assembly. |
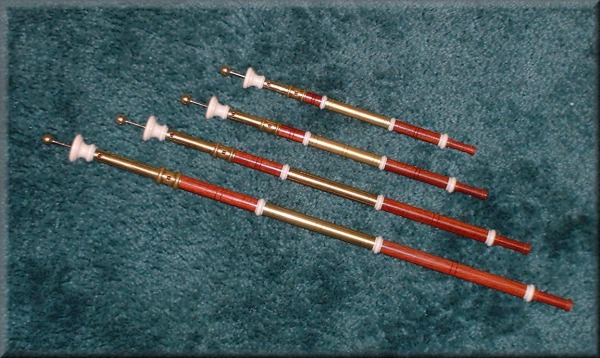 |
(19 Apr) Here are the drones fully assembled! Just a little more tweaking,
and they'll be ready for reeds.
Of course, now they'll need something to plug into...
|
 |
(5 May) If anyone out there is wondering, my
lathe motor broke down while i was making those end caps above. So i'm on
hold until i can get my motor repaired. |
 |
(21 May) FINALLY, my lathe is working again!
In the last few weeks, i've had tripping breakers, motors running only in
reverse, SMOKING motors, and technicians scratching their heads in disbelief.
At last, they figured it out, and i can get back to work. Yay! |
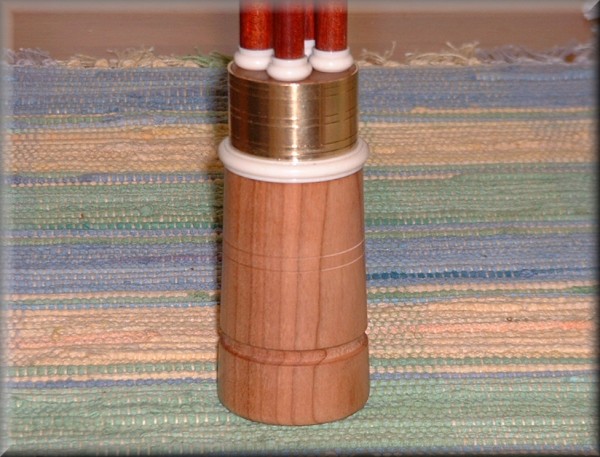 |
(24 May) The drone stock is made of cherry, since
i didn't have a piece of bloodwood big enough. It's also hollow, so all
the reeds are in the same chamber. |
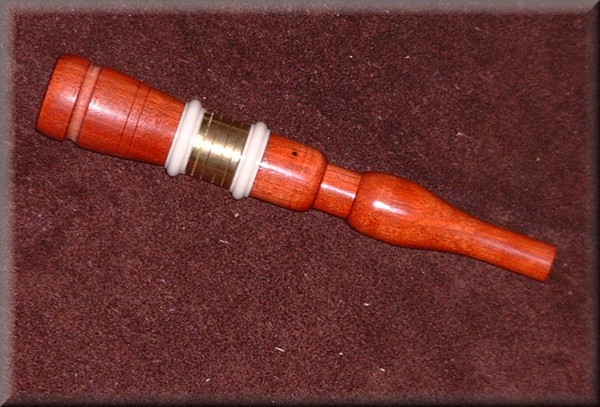 |
(31 May) Here is the blowpipe with its stock.
The dot near the bag end of the blowpipe is a little brass pin. It's there
to let you know at a glance which way is "up" for the clack valve.
The free end of the blowpipe is a nice snug fit into 1/2" ID flexible
tubing from my bellows. |
 |
(15 June) I've glued up a leather bag, and tied in all the stocks. I
spent last Friday evening making drone reeds, and then spent the weekend
falling head-over-heels in love with these drones. :-) For now, i'm playing
them with my (pre-lathe) Scottish small pipe chanters. The sound is sweet
and gentle, just what i've been hoping for in a set of smallpipe drones.
It's especially satisfying to note that i didn't have a complete set of
measurements to work from when i started. I mathematically scaled these
D drones from several sets of F drones, and sure enough they play right
on pitch!
|
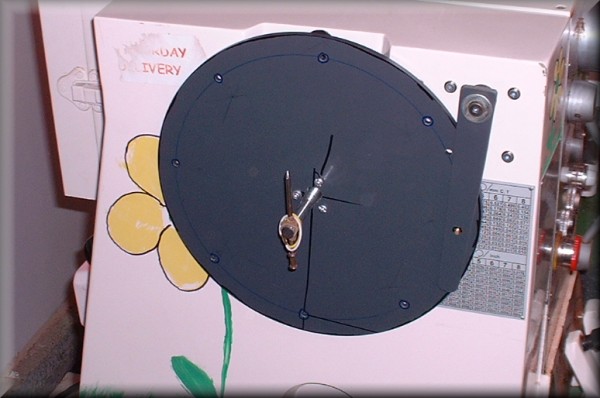 |
(29 June) This is going to be the first "serious"
chanter i'm making in my own workshop. Without a milling machine & dividing
head, i need a different way to accurately drill holes at different angles
around the chanter. This indexing plate is my solution. It clamps into the
lathe spindle, and the arm has a pin that locates into the eight holes around
the disk. This way, i can accurately turn and lock the chuck in 45-degree
increments for drilling fingerholes, milling keyways, and drilling key pivot
holes. |
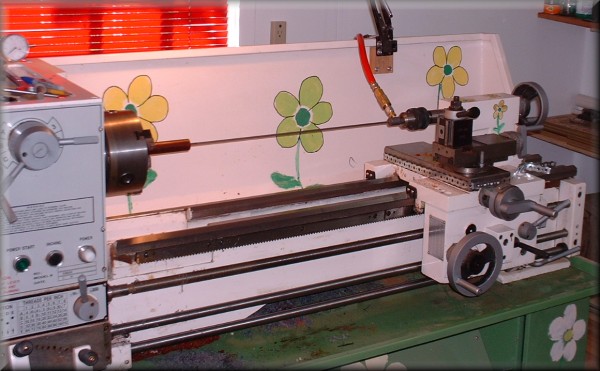 |
(4 July) The first step in making the chanter is to drill it out. I bought
a gundrill for doing this, which gives an absolutely perfectly smooth,
straight bore, in a single pass! Compressed air is fed into the base of
the drill, and it blows the chips (more like dust, really) back down the
long single flute. I've got it set up in the tailstock drill chuck, and
the tailstock is being "towed" by the lathe carriage on the
slowest power feed. So i just turn on the air, turn on the lathe, engage
the power feed, and stand back and watch it drill. :-)
|
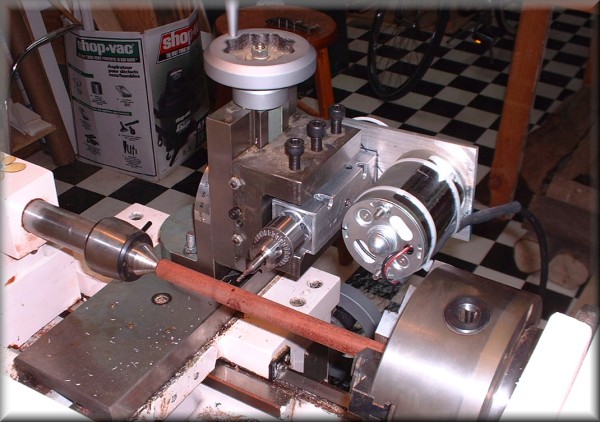 |
(23 Aug) Ok, for the last month and a half, i've
been designing and building this drilling attachment. It's powered by a
1/4 horsepower, speed-controlled DC motor. Held in the lathe's vertical
slide, it's like having a little drill press attached to the lathe - this
is the other half of the equation for accurately drilling fingerholes, milling
keyways, and drilling key pivot holes. This is easily the most ambitious
machining project i've undertaken, and so far it works great! |
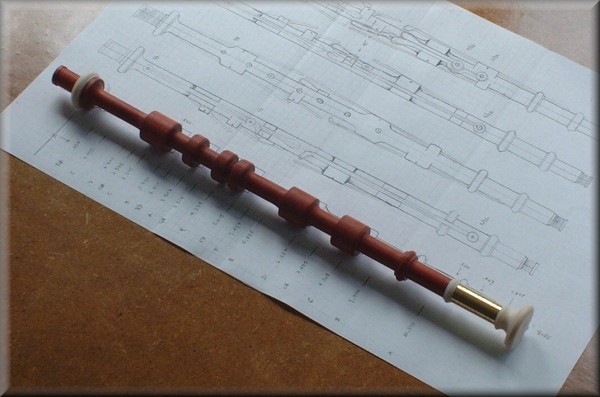 |
(6 Sept) Here is the chanter after being gundrilled and the outside turned,
leaving the key mounts as complete rings. The next phase is to cut the
key slots and fingerholes, and remove the waste material from the mounts.
I am, however, going to do some more testing before i submit this chanter
to the gentle touch of my drilling attachment pictured above. :)
|
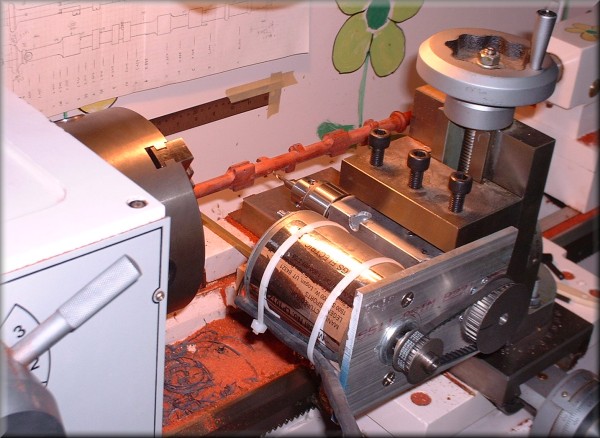 |
(25 Sept) Here is a view of my milling/drilling
spindle being used to drill the fingerholes in the chanter. At this point,
all the key blocks have been shaped and slotted, and the pivot holes drilled.
You can see a ruler taped on to the rear of the lathe, and there's a pointer
attached to the carriage, to indicate hole placement. |
 |
(25 sept) Ready to start making keys! |
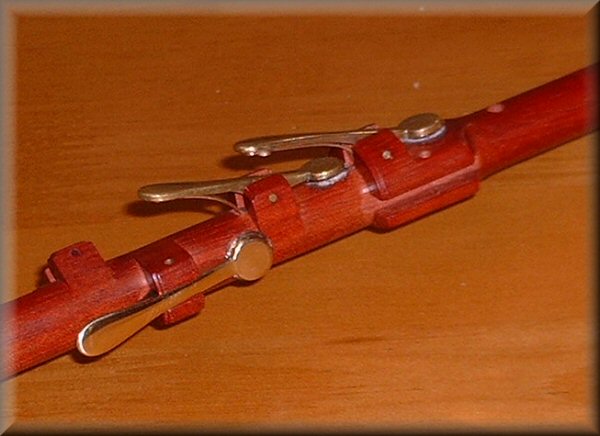 |
(28 Mar 2005) Again with the long hiatus.Anyway, on to the keys. After a few false starts, the procedure is starting to work pretty well. These short keys are coming in at about 4-5 hours each.
Here are the first three: G#, Bb and C natural. |
 |
(4 Apr) Six down - more than halfway done!
I'm averaging one key per week's worth of evenings, and one a day on weekends. So i estimate another couple of weeks to do the remaining four keys.
The double-wide slot at the lower left is for the C/C# pair, which have to miss each other on the way down to their holes. I'm leaving those for last. |
 |
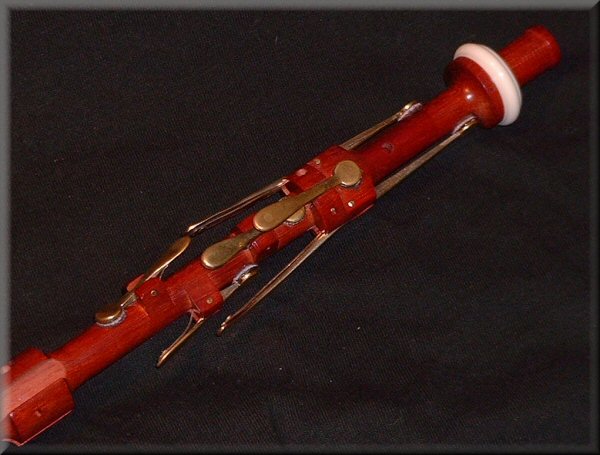
(23 Apr) The keywork is done! So that completes the construction - just some tweaking and final setup left to go. Then i have to learn to play it... :-) |
|
(8 May) Here is a sound sample of the pipes! The tune is "Spailpin A Run," an Irish slow air. I learned it years ago from a recording of Alistair Anderson playing it on Northumbrian pipes. I've been playing it for years on the uilleann pipes, and now i can also play it on the Northumbrian pipes! The tune fingers VERY differently on the two pipes, (plus i'm still a beginner at these pipes) so please forgive all the squeaks and stumbles. But it gives you an idea what the set sounds like. (Click the notes to listen to the mp3.) |
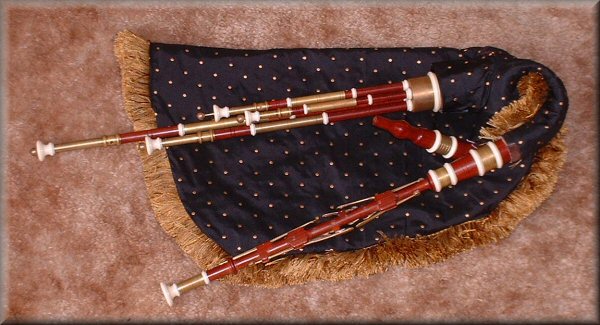 |
(23 May) The bag cover is the last piece of this puzzle. Click the image for a larger version showing the FINISHED set!
|
