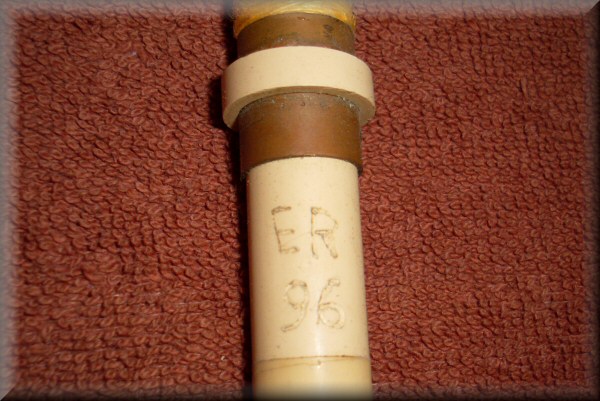
(By way of a "before" picture...) This is the chanter of my very first bagpipe project, made a whole lifetime ago. I made this mark with a hot nail!
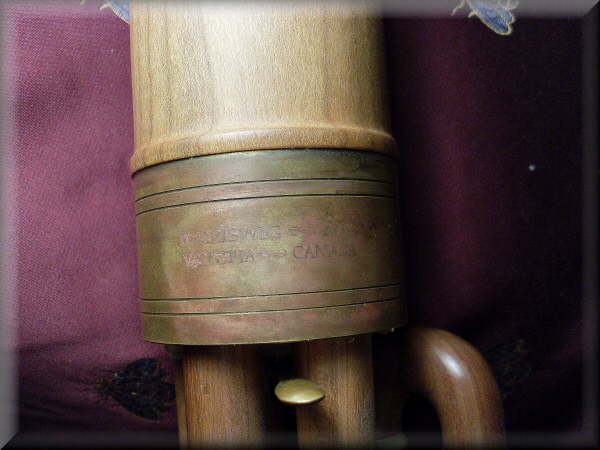
This was my first serious wooden pipemaking project on my own equipment - my uilleann "C" drones made in 2001. I took the mainstock ferrule to an engraving/trophy shop and had them do this work. (It looked better and more readable when it was new and shiny, but i've never been one to keep my pipes clean and polished...)
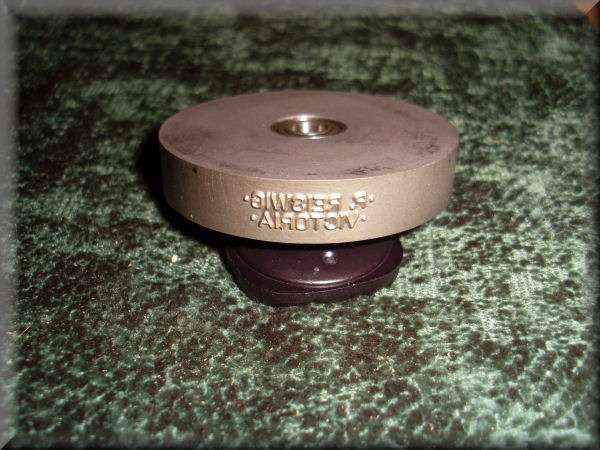
This is certainly better than the "work" above, but it's a pain to take the parts out to be engraved, and i'm also limited to only marking the metal parts. I wanted to be able to stamp into the wood itself.
Obviously, woodwind makers have been marking their work for centuries. I looked and looked and could not find any documentation as to how they typically go about it, either historically or presently. I had to figure it out myself.
After a bunch more searching around and learning what was even possible, i settled on the roll die as the most sensible way to get a mark onto a wooden cylinder. I also figured i could make the tooling to apply it in my own shop.
In the summer of 2009, i ordered this die from A.G. Russell Co. in Connecticut. They were great to work with, and had no problems at all dealing with a one-off order from a hobbyist in another country! (I contacted more than a handful of companies, and they were actually the only one to get back to me with a helpful response.)
Once again, i then spent a long time sketching and planning the holder (also trying to get someone else to make it!) This week i finally decided to go ahead and build the thing.
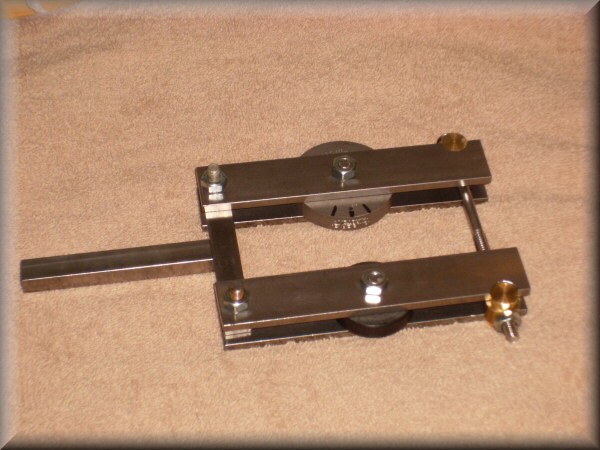
This is what i came up with. It's based on various designs for knurling tools i've seen on machinist sites.
At the left is the handle, which fits in the lathe toolholder. The marking die is on top, and on the bottom is a backup roller made from a section of (some might say old-fashioned) dot matrix printer platen. It's nice because it has a hard rubber outer layer which cushions the wood a little. Both the marking die and backup roller ride on ball bearings.
On the right side is the closer. You just need to close it until both wheels are just touching the workpiece. Actually, in order to avoid the backup roller denting softer woods, they don't even need to be actually touching! Since the letters have some height to them, it will mark as long as the letters will touch the wood when they come around.
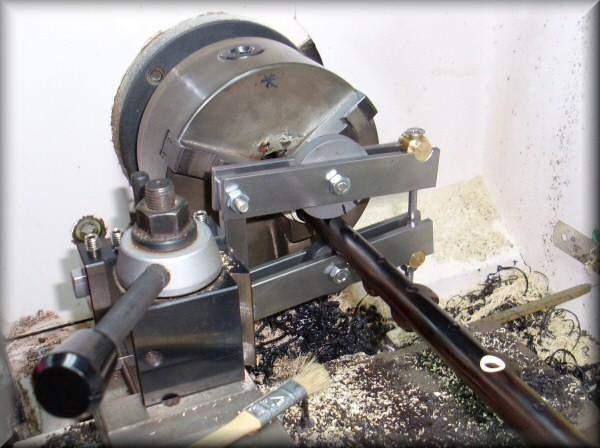
Here's the tool set up on a chanter in the lathe. Obviously the lathe is unpowered - you turn the chuck by hand, just enough to roll one impression onto the workpiece. It takes just a minute or two to get it all set up and aligned, and then only a few seconds to roll the mark onto the wood.
So it's actually not all that satisfying to use...
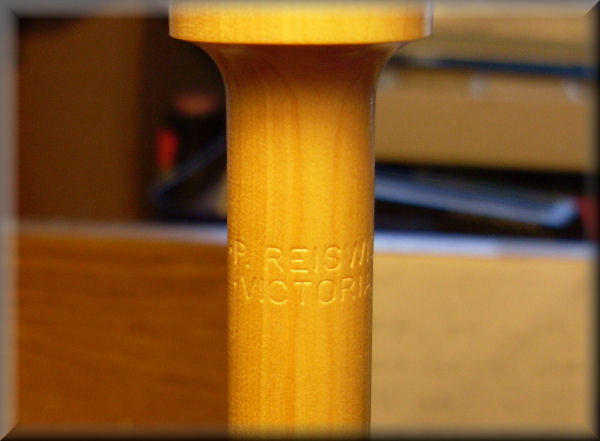
The results, however, are very satisfying.
This is the kind of mark i've been jonesing for - it looks like the work of a "real" woodwind maker! :)